Sunday, February 14, 2016

Dichotomous Key

 Dichotomous Key

One of the things we teach seventh graders in Texas is how to use a Dichotomous Key. We also provide them with a chance to create a Dichotomous Key because what better way to understand something than to create it.

Prior to creating a Dichotomous Key we have the students work with several of varying difficulty. My colleagues and I have located one with aliens, one with little creatures like gremlins and one that is emojis and we also use a leaf key which is scientifically inclined. We copy them so there are 2 keys per page and create a little booklet where the keys are in order from easiest to most difficult. I normally practice part of the first one with the students and then I go over the scientific one together as a class and we work the final key together. This normally takes only one and a half 45 minute class periods to complete.

Next we move on to creating a Dichotomous Key. For my regular education classes I begin with the worksheet shown above. We work on the first three sections together as a class and then I have them work on the rest with their partners. This takes up the other half a class period from the previous day.

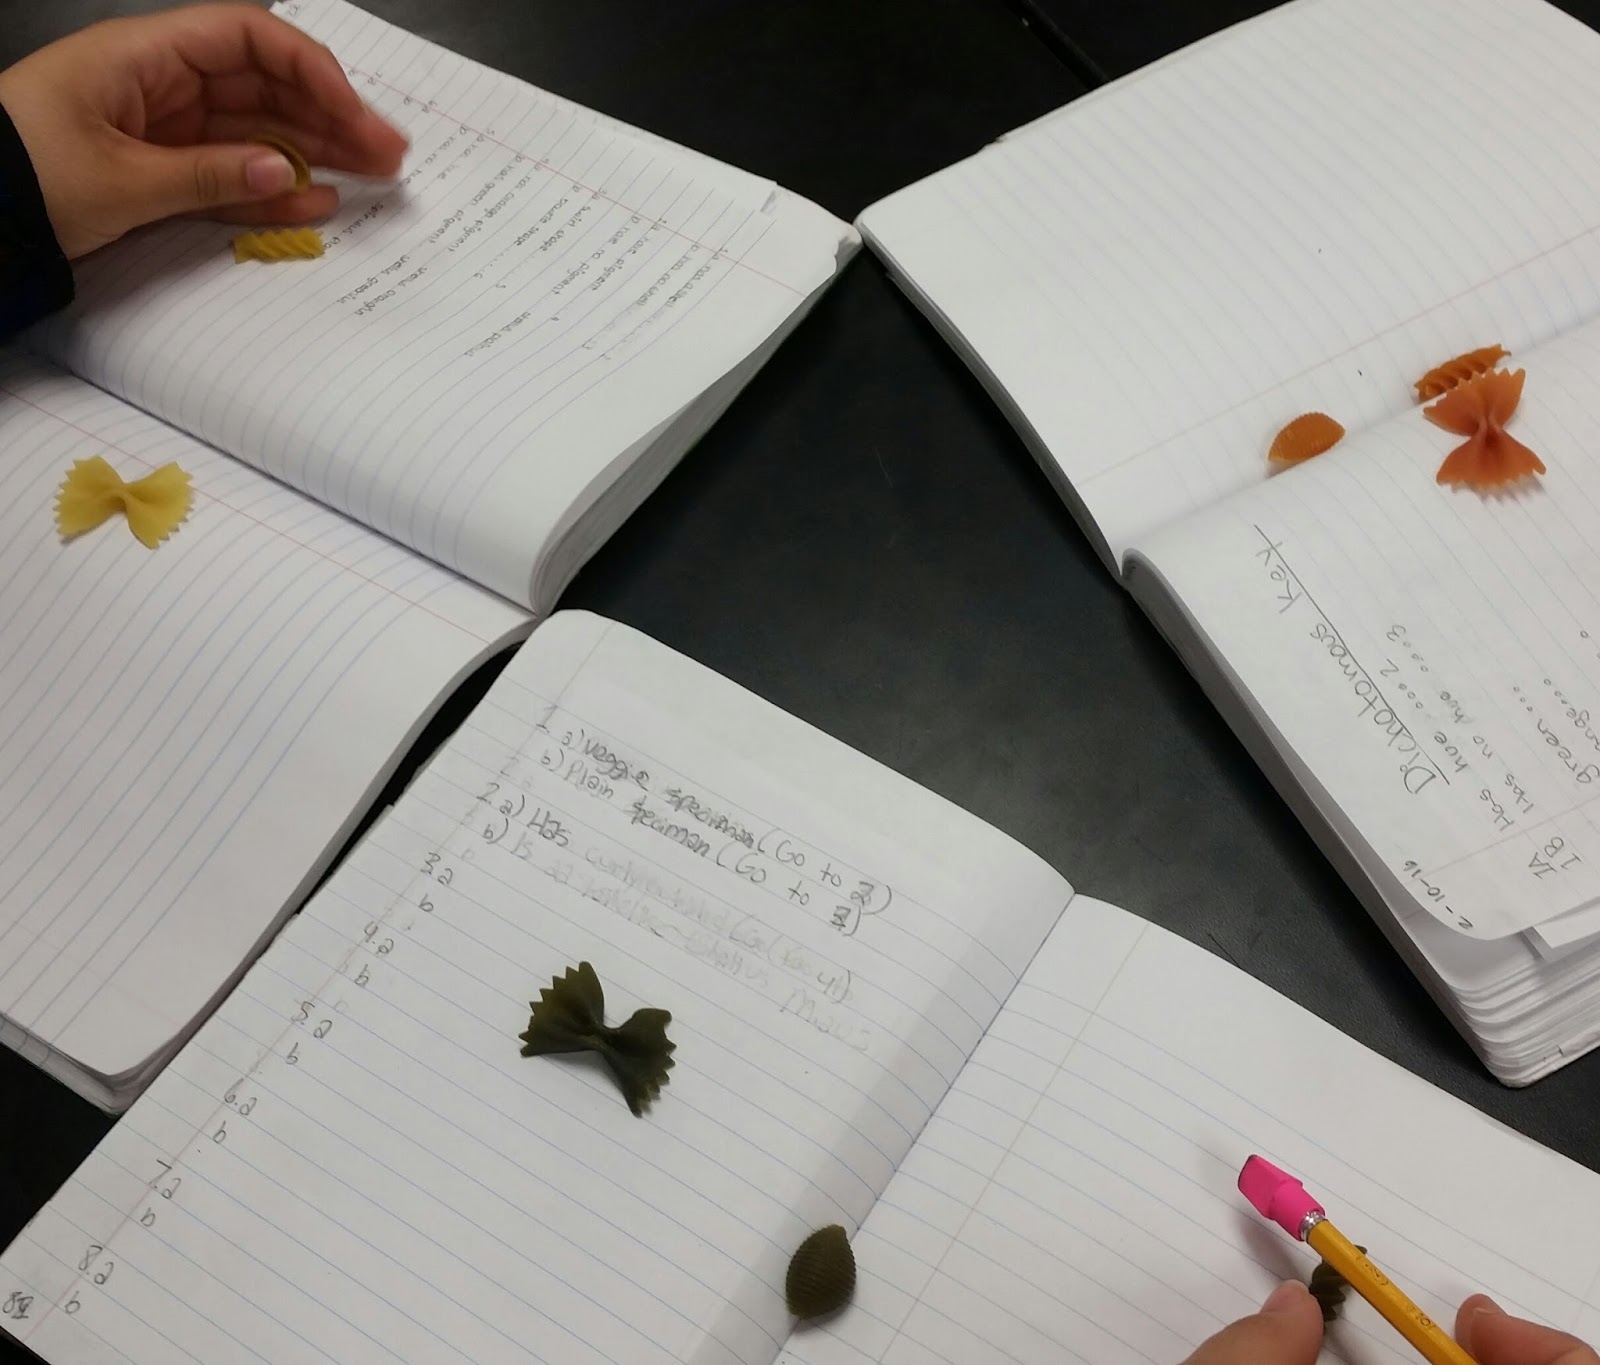
This year I tried something new with my Pre-AP classes. Rather than begin the creation process with the worksheet I decided to begin with  a hands on activity. As a class we reviewed the Dichotomous Key creation guidelines in their notes, then I provided the students with a baggie that help 9 pieces of uncooked pasta in 3 different colors. I then encourage the students to remove the pasta from the bag and to physically separate the pasta into groups. Since there are 9 pieces of pasta and 3 colors their first instinct is to split the pasta into 3 groups by either pasta type or pasta color. This causes them to pause and really think about how they can separate them into 2 groups to comply with the options available on each section of the key.

This activity gives them a really good opportunity to truly break down the process and consider how it works. The other thing that works well in this activity is having the students work together because they do not always agree with one another about how the groups should be split so then we are able to have a conversation about how this can occur in the real world and how scientists might have to deal with these things. 

I have heard of doing this same type of activity with 15 bean soup although I think that might work better for older students. You could also make this simpler by using pasta that is only one color so the students only group them by size or shape or you could simplify the activity by using pasta that splits evenly in half each time like using small, medium and large macaroni and small, medium and large shells.

Once I have completed this activity I give the partners a worksheet with 10 creatures, they must color and name the creatures and then they must create their own Dichotomous Key. I encourage them to cut the creatures out and physically separate them into groups. The physical separation seems to help the students with the Dichotomous Key creation. I allow the student groups 2 class days to use to complete their assignment.

All in all I use a week of class time to take notes, practice using the key, and then practice creating a key. 

Monday, February 8, 2016

Frog Dissection Lab


 Frog dissection Lab

The final component in our human body system unit is frog dissection. We have one prep day where we go over a power point that shows the students the steps to take in order to dissect the frog. I express to them how important it is to keep each body system intact and to observe it thoroughly before moving to the next system. We discuss how dissecting the frog gives us a better look at body systems. Then I show them a video on YouTube of a science teacher dissecting a frog so they get an additional look at the process. I also have them color a picture of an open frog showing it's digestive system and they create a Venn diagram and compare the frog digestive system to the human digestive system. this gives them a chance to see how many organs we have in common.
On day two of frog dissection the students are actually allowed to dissect the frog. Since I teach at a Title 1 school we only have enough frogs for one frog per group of four students. Some of the students are frightened or disgusted so they prefer to simply watch, but sometimes they all want to participate so they take turns since there are plenty of cuts to make and organs to remove. We do not have scalpels so we only use tweezers, scissors and probes during the dissection. I encourage the students to remove each organ, discuss the name of the organ and the body system that the organ comes from. I feel that this steps causes them to slow down in their excitement and really take a look at the body systems.

I have struggled with classroom management this year and with students unwillingness to complete assignments so this year I have large groups of students who were not able to participate in the actual frog dissection since it is a privilege, however I did not want them to miss out on the experience entirely so I decided to add some stations to frog dissection this year. 

I went to the local grocery store and I got several types of organ meat. Here in San Antonio we eat several dishes that require organ meat so I had no problems finding hearts, liver, brains, intestines and bones. I set out the various types of organ meat and I had a short question at each station. I asked the students to be sure to hold the organs, look at their structures and talk about why they might feel different from one another. I wish we could afford more gloves and more time in the lesson because I really would have liked to let the students spend a whole day just on this task. As it was they ran through it very quickly but they did gain quite a bit of joy and excitement from the task.


 I would like to do this again next year, I am going to work on it some this summer and determine what I can do to tweak this or see if I can write a grant to get more gloves so I spend an extra day on this. I would love to rewrite the whole system and spend 12-15 weeks just on human body systems but that's not going to happen just yet so I need to try to fit it in the best way I can. I do want to ensure this is meaningful to their learning and not just really fun to do.

On a final note I am not opposed to fun and I think one way to truly ensure that students recall some of their learning is by making learning fun. I always try to dress up for any large event we have. This year I found a frog hat at Target during Halloween in the costume section. I wore the hat all day and it really caught their attention. The students were so excited when they saw me in the hallway because they knew it was frog dissection day. In previous years I have used a frog puppet to read a body system book to the glass or to give directions during the human body system unit. I try to make sure everything ties together so they have some recall and for many of the students it works. (I know because I ask them science questions in the hallway when they come to visit me as 8th graders.)


Thursday, January 14, 2016

Human Body Systems


Our district gives us 25 days to use to go over body systems, but we normally are over our time for other units and end up condensing some on the body systems unit. One way I am able to condense the unit is by having the students complete body system booklets for seven of the ten systems they need to learn.

Body System Booklets: The body system booklets are made from worksheets I have obtained from the sites "Super Teacher Worksheets" and from "Education.com" I make sure that each booklet has some type of reading passage with questions and a picture of the body system or an organ from the body system for the students to color. Some of the worksheets have puzzles on them as well. The worksheets are all at an elementary school level so they are easy to comprehend even for my students who have very low comprehension levels.

I give the students two weeks to complete all seven booklets, plus they take generalized notes about all of the body systems and they complete a vocabulary chart with definitions of the function and structures of each system. I allow the students to go at their own pace and in the order they choose and each day I remind them that they should have finished at least 1 or 2 of the booklets. Then I check in with them and see how they are doing. I will also pull students together and do things as a small group to ensure the stragglers are getting things done.

The Menu: On the third week I provide the students with the body systems menu. Using the menu they produce two small projects and one slightly involved project that showcase important information such as the functions and structures for each body system, or how they interact with other body systems. For the small projects students are able to choose from creating index cards, charts, a power point, a crossword puzzle, bingo game or matching game. For the more involved project they are asked to create a travel brochure, scrapbook, children's book or poster. They have 1 week of class time to complete these assignments. They are of course always allowed to take their work home to work on it.

After all of this, we come together and discuss, we talk about how the body systems work together, we dissect frogs and then we take out unit test. That's how I teach human body systems.

Monday, November 9, 2015

Genetics Foldable

Some years I am very successful at teaching the students through labs and projects but some years those tried and true tactics don't work as well. This year my students need more guidance and direction, they work and recall especially well when we do activities together and the students repeat information as they write it down. This has led to many spontaneous changes in lessons this year.

Last week we attempted a class trait lab but the students were not getting the abstract connection between traits, alleles, genotypes and phenotypes when attempting lab so I decided it was time to change things up. I sat at my desk for awhile that afternoon trying to decide what to do and then I came up with an idea. I created a "Genetics Foldable."

I used a shutter fold.
Front: On one side of the foldable are the father's alleles (written in blue marker) for traits we had in a previous activity, and on the other side are the mother's alleles
Inside: The inside of each flap contains basic genetics questions, the inside center section is information about the genotype and phenotype of the offspring (written in purple because red and blue make purple)

I provided the students with the questions, I had them use their notes and previous activities to answer the questions, then we went over all of the questions answering them together and repeating the answers as we went.


Sunday, November 8, 2015

Pollinators

Today I participated in the Accessibility Fest in downtown SA, where we brought pollinator activities to share with the people downtown. The theme of our events is pollinators, so I created a game for the event.

For the game I purchased 4 serving platters shaped like flowers, 2 ladles that I added construction paper butterflies to, 2 large plastic serving spoons that I added construction paper bumblebees to, and a large bag of cotton balls.

There are 2 ways to play the game.:

1) A single child can play and race the clock. They get 30 seconds to try to get as much pollen as possible from one flower to the other in order to create new flowers.

2) two or more children can race against one another. Again they get only 30 seconds to try to move as much pollen as possible from one flower to the next flower. This can be played with 2-4 children.

This game is a good station to use with elementary students when teaching butterfly life cycles. Students could rotate and make the pasta life cycles,  color a life cycle, play this game, and do some reading and worsheets.


Tuesday, November 3, 2015

Walkabout Notes

There are many times in 7th grade science where we are introducing a new topic that the students have never seen before so we begin the unit with vocabulary and notes. Sometimes I go over the power point with the students and have them fill in their notes so that I can give them examples throughout the power point. Other times I put the notes on a Prezi, have the students fill in the blanks at home and then we have an in class discussion about them. When the unit is not as exciting to the students as they would like then I offer "Walkabout Notes."

For "Walkabout Notes" I print out the power point and then I put the slides up all over my room. I do not put the slides in order but I often group certain like concepts together in sections of the room. I provide the students with the fill in the blanks notes and I let them walk about the room to find the words that they will use to fill in the blanks. I also put up ten questions with the notes that range in Blooms level. The students answer the questions in their notebook on the page where they will glue their notes, then they glue down the notes so they can flip them up and see the questions underneath. I will then discuss the notes and the questions with the class. I also have a few copies of the power point printed as slides (3 per sheet) in case students cannot find something or if they are struggling with proper class etiquette.

Here are some pictures of how I arrange the notes:


Sunday, October 25, 2015

Lab Safety brings in supplies

This post is extremely late since I did this project at the very beginning of the year. Unfortunately, I continue to struggle with my career this year and the October death month has been even more difficult for me than usual. However, I do continue to push forward, I assign projects (even though fewer and fewer students are completing them) and then I assign alternate projects and alternate, alternate projects. I must say though that with this project I had an ulterior motive, I wanted more tissues for my classroom because allergy season and cold and flu season are no joke  in a classroom. I thought I would combine the project with a blatant push for supplies in order to get a few of the tissues I need.

Basically I asked the students to provide me with a tissue box that had lab safety information on 5 sides of the box. On the short opposing sides they had to write and draw or paste a picture about the do's and don'ts of lab safety then on the long opposing sides they had to write and draw or paste a picture about what they can and cannot wear in lab. On the bottom they had to write all of the lab safety rules from their lab safety contract. I made an example that I had in the classroom and on my school website. Here are some pics of my project: